
-
How To Clean Small Kitchen Appliances

At Ace’s Appliance Repair in Keller, TX, we know how easy it is to overlook small kitchen appliances when tidying up. But keeping these everyday gadgets clean isn’t just about appearances. It helps them last longer and work better. If you’ve ever recently noticed your coffee maker taking longer to brew or your toaster smelling a little off, now might be the time for a good cleaning. Let’s walk through some easy ways to keep these appliances in their best shape.
Why Keeping Small Kitchen Appliances Clean Matters?
Small kitchen appliances get a lot of use, which means they also collect a lot of grime: crumbs in the toaster, grease on the air fryer, and coffee residue in the machine. Regular cleaning helps prevent buildup, keeps your food tasting fresh, and can even improve performance. Plus, a clean appliance is just more pleasant to use.
Must-Have Cleaning Tools and Solutions
You don’t need a long list of fancy supplies to clean kitchen appliances. Most of the time, you can get great results with items you probably already have, such as:
- Microfiber cloths – Great for wiping away dust and grease without leaving streaks.
- Baking soda – Works as a mild abrasive to remove stubborn stains.
- White vinegar – Helps dissolve mineral deposits and cut through grime.
- Dish soap – A simple but effective way to remove grease and food residue.
- Toothbrush or small scrub brush – Perfect for cleaning small nooks and crannies.
- Cotton swabs – Great for buttons, knobs, and other tiny details.
How to Clean Popular Small Kitchen Appliances?
Cleaning small kitchen appliances doesn’t have to be a time-consuming task. With a little routine care, you can keep them in top working condition while extending their lifespan. Regular cleaning helps prevent food residue buildup and ensures your appliances function efficiently. Let’s walk through simple steps to clean some of the most used small kitchen appliances.
Coffee Maker
- Empty and rinse the carafe and filter basket.
- Fill the reservoir with equal parts white vinegar and water, then run a brewing cycle.
- Run two more cycles with clean water to rinse away any vinegar taste.
- Wipe down the outside with a damp cloth.
Toaster
- Unplug it and shake out crumbs over the sink.
- Remove and wash the crumb tray with warm, soapy water.
- Use a small brush to clean inside the slots.
- Wipe down the exterior with a damp cloth.
Blender
- Fill the blender with warm water and a drop of dish soap, then blend for 30 seconds.
- Rinse well and dry.
- If needed, disassemble and clean the blades separately.
- Wipe down the base with a damp cloth.
Air Fryer
- Remove and wash the basket with warm, soapy water.
- Wipe down the inside with a damp cloth.
- For stubborn grease, use a little baking soda and water.
- Never submerge the main unit in water.
General Maintenance Tips for All Small Appliances
To keep small kitchen appliances in great condition, always unplug them before cleaning to prevent electrical hazards. Wipe spills as soon as they happen to stop buildup from forming, which can make cleaning much harder later. Storing appliances in dry areas helps prevent rust and other damage that can shorten their lifespan. It’s also a good idea to follow manufacturer-recommended cleaning methods to avoid voiding warranties. Finally, regularly checking for wear and tear on cords and plugs ensures your appliances remain safe to use.
Safety Precautions While Cleaning
When cleaning small kitchen appliances, avoid immersing electrical components in water, as this can cause permanent damage. Let your appliances dry out completely before plugging them back in to prevent electrical shorts. If your appliance has sharp blades, use a brush to clean them rather than your fingers to avoid injuries. Additionally, steer clear of harsh chemicals that could leave behind residues on food-contact surfaces, opting instead for mild cleaners that are safer for everyday use.
Eco-Friendly Ways to Clean Kitchen Appliances
For those who prefer natural cleaning solutions, there are plenty of eco-friendly alternatives that work just as well as commercial products. Lemon and baking soda create a powerful grease-fighting paste, while white vinegar mixed with water is excellent for descaling coffee makers and kettles. Salt and lemon can be used as a natural scrub for stubborn stains, and switching to reusable cloths instead of paper towels helps cut down on waste. These simple swaps make it easy to maintain clean kitchen appliances while also being kind to the environment.
Make Cleaning a Regular Habit
A little upkeep goes a long way. Setting a reminder to clean kitchen appliances weekly or monthly makes a big difference in their performance and longevity. We always tell our customers that a well-maintained appliance is an easy-clean kitchen appliance. So, next time you’re wiping down your counters, take a few extra minutes to give your appliances a little love, too.
Call Ace’s Appliance Repair
Keeping small kitchen appliances clean doesn’t have to be a chore. With a few simple habits, you can keep your kitchen running smoothly and your appliances looking (and working) like new. If you ever run into trouble with one, contact Ace’s Appliance Repair. For $39 a month and no contract, our appliance maintenance plan includes an annual visit, as well as standard cleaning and maintenance on all household appliances. Call us today to learn more!
-
Home Appliances Tips

At Ace’s Appliance Repair, we know how much you rely on your home appliances every day. From washing clothes to keeping food fresh and ensuring a comfortable indoor climate, these devices make life easier and more efficient. Taking good care of them not only helps you avoid unexpected breakdowns but also saves money on repairs and replacements down the line.
The Role of Home Appliances in Improving Everyday Life
Home appliances do more than just provide convenience. They help us manage time more effectively and keep our homes running efficiently. A well-maintained refrigerator keeps groceries fresh longer, reducing food waste. A properly cleaned dryer operates efficiently, preventing unnecessary energy costs. Regular maintenance can even help prevent costly appliance repair jobs that come from neglect or buildup over time.
Taking care of your appliances means paying attention to small maintenance tasks. Cleaning condenser coils on your refrigerator, keeping your oven free of grease, and regularly checking your dishwasher’s filter are all simple ways to get the most out of your home appliances. When you stay on top of these tasks, you’ll notice better performance, lower utility bills, and fewer repair calls.
Laundry Appliances Tips
Laundry appliances take on a lot of heavy lifting, and a little upkeep goes a long way. We always remind customers to check their dryer vents regularly. A clogged vent not only reduces efficiency but can also be a fire hazard. Cleaning out lint traps after every load and periodically inspecting the vent hose keeps everything running safely and effectively.
For washing machines, avoid overloading the drum. Too many laundries in one cycle can strain the motor and lead to unbalanced loads, which wear down internal components over time. We also recommend using the right amount of detergent. Too much soap leads to excess residue buildup, which can clog hoses and create odors. Keeping your washing machine door open after use helps prevent mold and mildew, ensuring fresh-smelling clothes every time.
Climate-Control Appliances Tips
Your air conditioner and heater keep your home comfortable year-round, but they need regular maintenance to stay in top shape. We suggest replacing or cleaning filters every few months to keep airflow strong and your unit working efficiently. Dust and debris can clog the system, forcing it to work harder and increasing your energy bills.
If your A/C isn’t cooling like it used to, check the outdoor unit for leaves, dirt, or other obstructions. A quick clean can make a big difference. Similarly, keeping vents unblocked inside the home ensures proper air circulation and prevents the system from overworking.
Small Appliances Care Tips
Smaller appliances like coffee makers, toasters, and microwaves also need regular attention. We always encourage customers to clean coffee makers by running a vinegar solution through them to remove mineral buildup. Toasters should be emptied of crumbs to prevent overheating and potential fire hazards. And microwaves? A quick wipe-down with a damp cloth after each use keeps food splatter from hardening, making deep cleaning less of a chore.
For blenders, food processors, and similar appliances, ensure that all detachable parts are cleaned and dried thoroughly after use. Moisture buildup can lead to mold growth and affect performance over time. Taking a few extra minutes to maintain small appliances keeps them working longer and saves money on replacements.
Troubleshooting Common Appliance Issues
Sometimes, appliances act up. Before calling for appliance repair, a few quick checks can save time and money. If a refrigerator isn’t cooling properly, make sure the thermostat is set correctly and that the door seals are intact. A loose or damaged seal lets cold air escape, making the fridge work harder than necessary.
Dishwashers leaving dishes dirty? The spray arms might be clogged with debris. A quick rinse or poke through the holes with a toothpick can improve water flow. If your washing machine isn’t draining, check the drain hose for blockages or kinks. These simple home appliance repair tips often solve minor problems without the need for a service call.
Home Appliance Safety Practices
We always stress safety when it comes to home appliances. Unplugging devices before cleaning, keeping water away from electrical components, and never overloading outlets are just a few good habits to follow. If an appliance has a frayed cord, don’t wait; replace it immediately. Faulty wiring is one of the leading causes of appliance-related fires.
Disposing of Old Appliances Responsibly
When it’s time to replace an old appliance, responsible disposal matters. Instead of sending it to the landfill, consider recycling options. Many appliances contain materials that can be reused, and some retailers even offer take-back programs when you purchase a new unit.
If your aging appliance still works, why not donate it? You can donate appliances to several organizations in the Keller, Texas area, including Christ’s Haven, Habitat for Humanity, and Goodwill. If your appliance is past its prime and needs to be disposed of, you can contact the city of Keller recycling services for bulk waste disposal.
Call Ace’s Appliance Repair
At Ace’s Appliance Repair, we’re always here to help with appliance repair tips and maintenance advice. For only $39/month, you can take advantage of our appliance repair and maintenance membership plan. Let us take care of your appliances and keep them running longer, saving you money in the long run. Contact us today to learn more.
-
Common Oven Problems and How to Fix Them
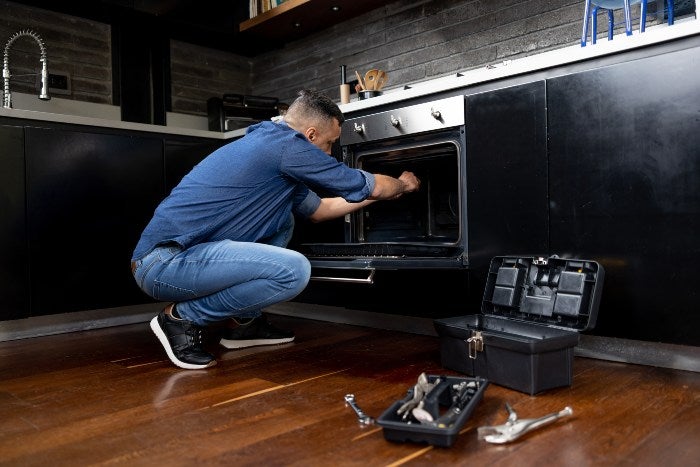
Troubleshooting Common Oven Problems
Ovens are essential appliances in any kitchen, but they’re not immune to wear and tear. At Ace’s Appliance Repair, we’ve helped countless Keller, TX, residents troubleshoot and fix common oven problems. Here, we share practical tips to address these issues and keep your oven running smoothly.
Oven Temperature Is Too High or Low
An oven that doesn’t maintain the correct temperature can ruin meals. This issue often arises from a faulty thermostat or temperature sensor. Over time, these components may become inaccurate, causing your oven to overheat or fail to reach the desired temperature.
How to Fix It:
- Check the temperature sensor to ensure it isn’t touching the oven walls.
- Test the sensor with a multimeter to confirm it’s working correctly. Replace it if needed.
- Calibrate the thermostat following the manufacturer’s instructions.
- Consider consulting a professional if you’re unsure about the calibration process.
Oven Won’t Ignite or Draw Power
If your oven won’t ignite or turn on, the problem could be a malfunctioning igniter, power supply issues, or a blown fuse. Gas ovens often have igniters that fail over time, while electric ovens may face circuit interruptions.
How to Fix It:
- For gas ovens, check the igniter for visible damage or wear. Replace it if it doesn’t glow when attempting to ignite.
- Ensure the power cord is securely plugged into the outlet and check your home’s circuit breaker.
- Replace any blown fuses or call a professional for electrical repairs.
- Inspect wiring connections to rule out loose or damaged connections.
Oven Door Is Jammed or Won’t Latch
A jammed oven door can be frustrating and unsafe. This issue often occurs due to misaligned hinges, broken springs, or debris obstructing the latch mechanism.
How to Fix It:
- Inspect the door hinges for damage or misalignment. Tighten screws or replace faulty hinges as needed.
- Remove debris from the latch area.
- Replace worn-out springs or latches for a secure fit.
- Test the door seal for flexibility to ensure it’s not contributing to the issue.
Oven Light Fails to Turn On
A non-functional oven light makes it difficult to monitor your food without opening the door. The problem usually lies with a burned-out bulb or faulty socket.
How to Fix It:
- Replace the bulb with a high-heat-resistant appliance bulb.
- If the new bulb doesn’t work, inspect the socket for damage and replace it if necessary.
- Check the light switch for proper function and replace it if defective.
- Regularly clean the light cover to ensure maximum brightness.
Oven Won’t Cook Food Evenly
Uneven cooking can result from a malfunctioning heating element or poor air circulation. This problem is common in older ovens or those with blocked vents.
How to Fix It:
- Inspect the heating elements for visible damage. Replace them if they’re not glowing evenly.
- Clean the oven to remove grease or debris blocking the vents.
- Rotate baking trays halfway through cooking to promote even heat distribution.
- Test the fan in convection ovens to ensure proper airflow.
Tips for Oven Maintenance
Regular maintenance can prevent many of these common oven problems. Here’s how you can keep your oven in top condition:
- Clean the interior regularly – Wipe spills promptly and deep-clean the oven periodically to prevent buildup.
- Inspect door seals – Ensure the gasket around the door is intact to maintain proper heat levels.
- Avoid using harsh chemicals – Stick to oven-safe cleaning products to protect internal components.
- Test heating elements – Periodically check that all elements are functioning properly.
- Schedule professional inspections – For peace of mind, have a technician examine your oven annually.
- Check for unusual smells or noises – These can indicate early signs of trouble.
When to Call a Professional
Some oven problems require professional attention. For instance:
- Gas leaks – If you smell gas, turn off the supply and contact a professional immediately.
- Electrical issues – Complex wiring or circuit repairs should always be handled by an expert.
- Broken control panels – Malfunctions in electronic components often need specialized tools and expertise.
- Repeated issues – If the same problem keeps occurring, a professional can identify the root cause.
At Ace’s Appliance Repair, we specialize in resolving these challenges safely and efficiently. Whether you’re dealing with common electric oven problems or need help with a microwave oven issue, our team is here to assist.
Why Choose Ace’s Appliance Repair?
With over 20 years of experience serving Keller, TX, we pride ourselves on providing reliable appliance repair services. From oven repair to other household appliances, we’re committed to quality and customer satisfaction. Check out our web promotions for the latest deals.
Contact us today to schedule a service and keep your appliances running smoothly!
-
Common Causes of Dishwasher Leaks
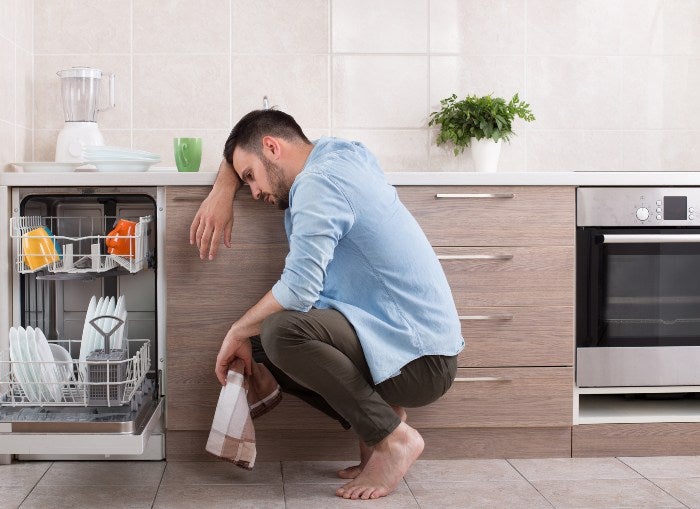
Dishwasher Leaks: Common Problems and Fixes
Dishwashers are a staple in modern kitchens, making daily cleanup quick and easy. However, when they start leaking, it can lead to water damage and reduced performance. At Ace’s Appliance Repair, we’ve seen it all, and we’re here to help you understand what might be causing your dishwasher to leak and how to fix it.
Faulty Door Seals
One common cause of dishwasher leaks is faulty door seals. Over time, the rubber gasket around the door can crack or wear out, preventing a tight seal and allowing water to escape. Leaks from faulty door seals are often noticeable as puddles forming directly beneath the dishwasher door.
Prevention Tip – Regularly check the door seal for wear and clean it to remove debris that could affect its performance. If it’s damaged, replacing it can solve the problem.
Clogged Filters
Filters play a crucial role in ensuring proper water drainage. When they become clogged with food particles and debris, water can back up and leak from the appliance. Clogged filters can also reduce the efficiency of your dishwasher, leaving dishes less clean after a cycle.
Prevention Tip – Clean your dishwasher’s filters regularly to maintain smooth water flow and optimal performance. A quick rinse under running water can prevent long-term blockages.
Broken or Loose Hoses
The hoses connecting your dishwasher to the water supply and drain system can deteriorate over time. Cracks, loose connections, or complete disconnections are common issues leading to leaks. These problems are especially common in older units or when the hoses are not secured properly during installation.
Prevention Tip – Inspect the hoses periodically for damage or wear. Replace them if needed to avoid leaks and to protect your kitchen from water damage. Use high-quality replacement hoses for better durability.
Improper Installation
A poorly installed dishwasher is another frequent source of leaks. If the appliance isn’t level or the connections aren’t secure, water can seep out during a cycle. Improper installation can also lead to misaligned spray arms, contributing to uneven water distribution.
Prevention Tip – Always have your dishwasher installed by professionals. Our team at Ace’s Appliance Repair ensures proper installation, so you don’t have to worry about leaks.
Overloaded or Poorly Loaded Dishwasher
When a dishwasher is overloaded or when dishes are placed improperly, it can disrupt water flow and cause spills. Blocking the spray arms can also lead to uneven water distribution, leaving some areas of your appliance more prone to leaks.
Prevention Tip – Load dishes according to the manufacturer’s recommendations. Ensure the spray arms have room to rotate freely and that no utensils or dishes obstruct their movement.
Damaged Float Switch
The float switch is a small but essential component that regulates water levels in your dishwasher. If it becomes stuck or damaged, it may cause the appliance to overfill and leak. This issue can often be identified by water pooling under the dishwasher, even when it’s not in use.
Prevention Tip – Test the float switch occasionally by moving it gently. If it’s not functioning properly, it’s time for a replacement. Replacing the float switch can prevent recurring leaks.
Other Potential Causes of Leaks
While these issues are common, other factors can also contribute to dishwasher leaks:
- Dishwasher air gap leaking – Blockages in the air gap can lead to backups and leaks. This issue often presents as water leaking onto your countertop.
- Worn pump seals – Over time, the seals around the pump can degrade, causing water to escape. This can often be repaired by replacing the seals without needing a full pump replacement.
- Cracked tub – Older dishwashers may develop cracks in the inner tub, leading to leaks. This issue may require replacing the dishwasher entirely, depending on the extent of the damage.
Tips for Prevention and Maintenance
Preventing leaks and maintaining your dishwasher’s performance is easier than you might think. Here are some practical tips:
- Inspect and clean regularly – Check door seals, filters, and hoses for damage or buildup. Regular maintenance can prevent small issues from becoming costly repairs.
- Use the right detergent – Avoid excess suds by using the recommended detergent. Too many suds can lead to leaks and poor cleaning performance.
- Don’t overload – Load dishes correctly and avoid overcrowding. Overloading can stress components and increase the risk of leaks.
- Run maintenance cycles – Use dishwasher cleaners to remove buildup. Maintenance cycles can improve efficiency and prolong the lifespan of your appliance.
- Address issues quickly – If you notice a leak, investigate promptly to prevent further damage. Small leaks can escalate into larger problems if left unchecked.
At Ace’s Appliance Repair, we’ve been helping Keller, TX, homeowners with appliance repair for over 20 years. Whether it’s dishwasher leak repair or general appliance repair, our experienced team is here to help. We take pride in providing friendly, reliable service that keeps your appliances running smoothly. Check out our web promotions for great deals and let us handle your dishwasher issues with confidence.
Contact us today to schedule a service!
-
Causes of Why Your Freezer is Leaking Water
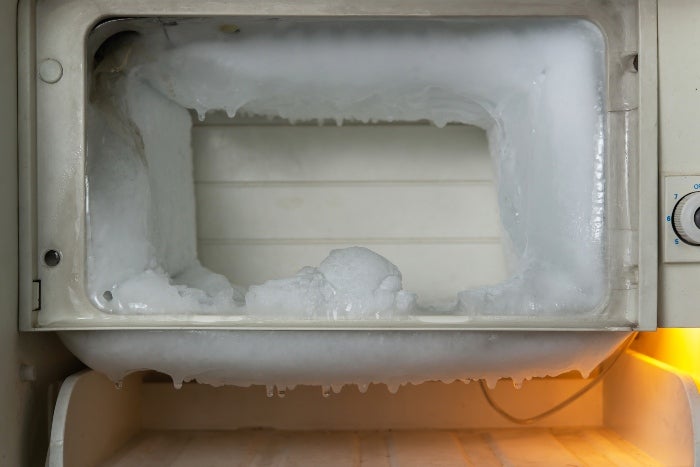
Why Is Your Freezer Leaking?
A leaking freezer can lead to more than just puddles on your floor. It may signal deeper issues with your appliance that require immediate attention. Understanding the common causes of freezer leaks and addressing them early can help you avoid costly repairs. If you’re dealing with freezer leaks, Ace’s Appliance Repair in Keller, TX, is here to provide expert appliance repair services.
Common Causes of Freezer Leaks
- Cracked Drain Pan
A cracked drain pan is one of the most frequent causes of freezer leaks. The drain pan collects water during the defrost cycle and allows it to evaporate. When the pan is damaged, water can leak out. If you notice water pooling around your freezer, inspect the drain pan for cracks and replace it if needed.
- Clogged Drain Hole
Over time, food debris or ice can clog the drain hole, preventing water from draining properly during the defrost cycle. This causes water to back up and leak inside or outside the freezer. Cleaning the drain hole with warm water and a soft brush can solve this issue and restore proper drainage.
- Arrangement of Food
Improperly arranged food can block air vents, affecting the freezer’s ability to regulate temperature and causing condensation buildup. This excess moisture can lead to leaks. Make sure there’s enough space around your food to allow for proper airflow and avoid overloading your freezer.
- Defrosting Your Freezer
For freezers without an automatic defrost function, ice buildup can block the drain system if not defrosted regularly, and this can result in water leaking. When the ice eventually melts, make it a habit to defrost your freezer as needed to prevent future ice blockages.
- Defective Door Seal
A damaged or worn-out door seal can allow warm air to enter the freezer, leading to condensation and leaks. Inspect the door gasket carefully. If you notice any cracks or gaps, replace the seal. Replacing the seal will prevent air from leaking and help maintain the proper temperature inside your freezer.
- Temperature Control Issues
If the temperature inside your freezer is set too high or fluctuates, it may cause condensation, leading to leaks. Make sure your freezer is set to the recommended temperature, typically around 0°F (-18°C). If adjusting the temperature doesn’t resolve the issue, the thermostat or temperature control system may require professional repair.
Maintenance Tips for Preventing Freezer Leaks
Preventing freezer leaks is often as simple as following regular maintenance routines. Here are some tips to keep your freezer leak-free:
- Clean the Drain Hole – Regularly clean the drain hole to prevent clogs and ensure water drains properly.
- Check the Door Seal – Inspect the door seal regularly for wear or damage. Replacing a faulty seal can prevent leaks caused by improper sealing.
- Defrost Regularly – Defrost your freezer as needed to prevent ice buildup that can lead to water leaks.
- Monitor Temperature Settings – Always make sure the freezer is set to the appropriate temperature to avoid condensation issues.
- Arrange Food Properly – Avoid blocking air vents and overfilling your freezer to allow for proper airflow and temperature regulation.
By following these steps, you can reduce the risk of leaks and prolong the lifespan of your freezer.
Why Addressing Freezer Leaks Early is Important?
Ignoring a small freezer leak can quickly lead to more serious problems. Here’s why it’s essential to address leaks early:
- Prevent Costly Repairs – A minor issue, such as a clogged drain, can lead to more significant damage if not addressed. Early repairs can save you from larger, more expensive fixes down the line.
- Avoid Water Damage – Leaks can cause water damage to your flooring, walls, and nearby appliances. Tackling the problem early helps prevent costly home repairs.
- Prolong Appliance Lifespan – Regular maintenance and early repairs help keep your freezer running efficiently and extend its useful life.
- Improve Energy Efficiency – A properly functioning freezer runs more efficiently, helping you save on energy bills by avoiding overworking the appliance.
When to Call a Professional
While some freezer issues can be solved with basic maintenance, others require professional help. If you’ve tried these troubleshooting steps and your freezer is still leaking, it’s time to call a professional. Aces Appliance Repair offers expert freezer repair services in Keller, TX, for both residential and commercial freezers.
Some issues that may require professional attention include:
- Persistent water leaks despite cleaning the drain hole and defrosting
- A malfunctioning temperature control system
- A defective door seal that needs replacing
- Cracks or damage to the internal components, such as the drain pan
Professional repair services can quickly diagnose and resolve more complex problems, saving you time and preventing further damage to your appliance.
Conclusion
Freezer leaks can be a nuisance, but they’re often easy to fix if you catch them early. From clogged drain holes to defective door seals, understanding the common causes of leaks can help you prevent them from happening. Regular maintenance, such as cleaning the drain hole and checking the door seal, can go a long way in preventing leaks and extending the life of your freezer. For expert freezer and leak repair and other appliance repair services, contact Ace’s Appliance Repair.
For over 20 years, homes in Keller, TX, have trusted Aces Appliance Repair for all their appliance needs. Our licensed and insured technicians bring years of experience fixing refrigerators, freezers, stoves, dishwashers, and more. With speed and expertise, we diagnose and repair appliances quickly with minimal disruption to your home. As a locally owned business, we understand the importance of dependable, fast service and are committed to keeping your household running smoothly with quality repairs, replacements, and maintenance.
-
Reasons Your Oven is Not Heating Up and How to Fix It

If your oven isn’t heating up, it can be frustrating and throw off your cooking plans. Whether it’s a simple issue or something more complex, figuring out the problem is key. In this article, we’ll walk you through common causes and fixes. For expert oven repair services. Aces Appliance Repair in Keller, TX, is here to help with their 20-plus years of experience.
Common Reasons Why Your Oven Isn’t Heating
- Your Appliance is Unplugged – Before you dive into troubleshooting, make sure the oven is plugged in. It may seem simple, but sometimes, the cord can come loose or be accidentally unplugged.
- The Circuit Breaker is Tripped – Your oven requires significant power, and the circuit breaker might trip if it becomes overloaded. Check your breaker box and reset the switch if necessary.
- The Heating Element is Broken – The heating element, which produces heat, may be damaged. If it has visible cracks or blisters, it must be replaced.
- Temperature Sensor Misalignment or Damage – A faulty temperature sensor can cause your oven to heat incorrectly. If misaligned or broken, the sensor won’t be able to regulate the oven’s temperature properly.
- Your Oven Needs Recalibration – If your oven is heating but not reaching the set temperature, it may need recalibrating. Many modern ovens have a recalibration feature that can reset the temperature accuracy.
- The Door Won’t Shut Properly – If your oven door doesn’t seat fully, heat will escape, preventing the oven from reaching the correct temperature. Inspect the door to make sure the gasket isn’t worn out.
- The Oven Won’t Self-Clean – When the oven’s self-cleaning mode isn’t working, it’s often due to a door lock or temperature setting issue. Check the door and the cleaning cycle settings before attempting to fix this problem.
How to Fix Common Oven Problems
Here are a few simple fixes for common oven issues:
- Check the Power Supply – Always start by making sure that your oven is properly plugged in, and the circuit breaker is working.
- Replace the Heating Element – If your heating element is visibly damaged, replacing it can restore your oven’s functionality.
- Recalibrate the Temperature – Follow your oven’s manual instructions to recalibrate the temperature settings.
- Fix Door Seals and Gaskets – If your oven door isn’t sealing, replace the worn-out gaskets or check to see if the latch needs adjusting.
- Inspect and Replace the Temperature Sensor – If recalibration doesn’t work, the sensor might be broken and needs to be replaced.
For more complex issues like commercial oven repair, it’s best to consult a professional oven repair technician.
Maintenance Tips to Prevent Future Issues
Preventive maintenance can help extend the lifespan of your oven and prevent common heating issues. Here are a few tips to keep your oven in excellent condition:
- Clean Regularly – A clean oven functions better. Wipe down the interior after every few uses, especially if there are spills.
- Inspect Door Seals – Check the door gaskets regularly for signs of wear and tear. Replace them if necessary to maintain a proper seal.
- Check Heating Elements – Every few months, inspect the heating elements for damage or signs of wear.
- Don’t Overload the Oven – Avoid putting too much food in the oven at once, as this can block airflow and cause uneven heating.
- Schedule Regular Inspections – Annual maintenance checks by a professional appliance repair service can catch minor issues before they become major problems.
When to Call a Professional
While some oven issues can be resolved with a quick fix, others require a more experienced touch. If you’ve gone through these troubleshooting steps and your oven is still not heating properly, it might be time to call a professional. Ace’s Appliance Repair offers both residential and commercial oven repair services in Keller, TX. Their skilled technicians can quickly diagnose the issue and provide an effective solution.
Some issues that warrant a professional repair service might include:
- Heating element replacement
- Electrical issues
- Sensor replacement
- Door latch repairs
Conclusion
An oven that isn’t heating properly can be a hassle, but many common issues can be fixed with a bit of troubleshooting and maintenance. Always start by checking the basics, like the power supply and temperature settings. If the problem persists, or if you feel uncomfortable handling repairs yourself, reach out to the professionals at Ace’s Appliance Repair. We offer top-notch oven repair services to help you get back to cooking in no time.
Ace’s Appliance Repair has been serving Keller, TX, for over 20 years, providing expert repair and maintenance for refrigerators, stoves, dishwashers, and more. Our licensed and insured team is highly trained to work with any make or model. We pride ourselves on delivering fast, reliable service and diagnosing and fixing issues quickly and efficiently so you can return to your daily routine. As a local business, we’re committed to providing the Keller community with exceptional service and swift turnaround times on all appliance repairs.
-
Ways to Save Water and Energy with Your Dishwasher
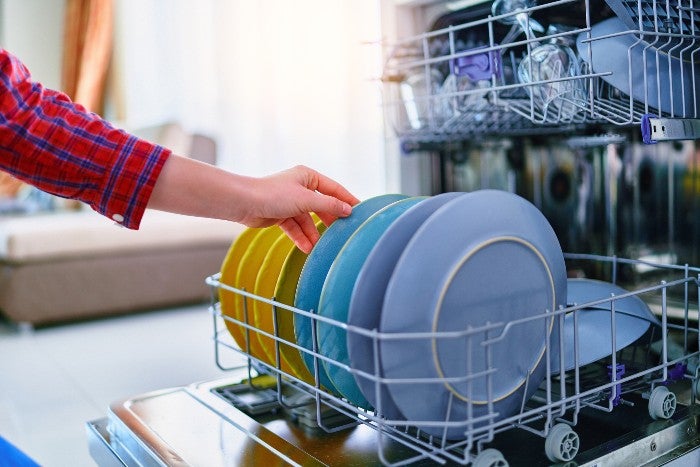
Dishwashers are a modern convenience that not only saves time but can also help you conserve water and energy. Many people believe handwashing is more efficient, but dishwashers can often be the greener option with today’s advanced technology. By making small changes to how you use your dishwasher, you can significantly lower your household’s water and energy consumption. Whether you need appliance repair, dishwasher rack repair, or want to upgrade to a newer, more efficient model, Ace’s Appliance Repair is here to help residents in Keller, TX, and the surrounding Tarrant County area.
The Myth About Dishwashers
A common myth is that dishwashers use more water than handwashing. While this might have been true for older models, it’s certainly not true today. Modern dishwashers are built to be highly efficient, using far less water than washing dishes by hand. The average dishwasher uses between 3 and 4 gallons of water per cycle while handwashing the same number of dishes can use over 20 gallons. The key is to maximize your dishwasher’s efficiency by following some simple guidelines.
How Can You Save Water When Using the Dishwasher?
There are several ways to reduce water waste when using your dishwasher, making it both eco-friendly and budget-friendly:
- Wait for Full Loads – One of the easiest ways to conserve water is to only run your dishwasher when it’s fully loaded. Running smaller, half-empty loads will waste both water and energy. Make it a habit to wait until you have enough dishes to fill the machine.
- Skip Pre-Rinsing – Pre-rinsing dishes can waste a lot of water. Most modern dishwashers are powerful enough to remove food particles without the need for pre-washing. Scrape any large food remnants into the trash and let your dishwasher do the rest.
- Select the Right Cycle- Many dishwashers have eco-friendly or water-saving cycles. These settings are designed to use less water while still delivering a thorough clean. Always consult your dishwasher’s manual to find the most efficient settings for your machine.
- Repair Leaks Immediately – Even a tiny leak can lead to gallons of wasted water over time. If you notice any sign of leakage, it’s essential to get professional dishwasher repair from a trusted service like Ace’s Appliance Repair.
How to Make a Dishwasher More Energy-Efficient?
Making your dishwasher more energy-efficient is a great way to reduce electricity usage. Here are some essential tips:
- Use Air Dry – Skip the heated drying cycle and allow your dishes to air dry. This step can save a significant amount of energy.
- Run the Dishwasher During Off-Peak Hours—If your utility company offers lower rates during off-peak hours, plan to run your dishwasher in the evening.
- Load the Dishwasher Efficiently – Properly arranging your dishes ensures that water and detergent can clean everything effectively, reducing the need for additional washes.
Selecting an Energy-Efficient Dishwasher
If your dishwasher is old or frequently needs repairs, it may be time to consider an upgrade. Here’s what to look for when selecting a new, energy-efficient dishwasher:
- Energy Efficiency Rating – Look for dishwashers with an Energy Star® These models meet strict energy-saving guidelines set by the U.S. Environmental Protection Agency.
- Size and Capacity – Choose a model that fits your household’s needs. Larger families may require a bigger dishwasher, but smaller households can save energy with a compact model.
- Modern Features – Newer dishwashers offer features such as soil sensors, which adjust water usage based on how dirty the dishes are, and half-load options, which use less water for smaller loads.
Maintenance Tips for Efficiency
Regular maintenance is key to keeping your dishwasher running efficiently. Ace’s Appliance Repair offers the following tips:
- Clean the Filter – Regularly cleaning the filter helps improve water flow and cleaning efficiency.
- Inspect the Dishwasher Rack – Over time, dishwasher racks can wear down, leading to rust. If your dishwasher racks are rusty or damaged, consider repairing or replacing them to prevent further issues.
- Check for Leaks – A small leak can lead to higher water bills and inefficient washing. Regularly inspect your dishwasher and call a professional if you notice any leaks.
Conclusion
Optimizing your dishwasher’s efficiency is an easy way to save both water and energy. Whether it’s by using the right settings or upgrading to a more energy-efficient model, there are plenty of ways to make your dishwasher work harder for you. When your dishwasher needs maintenance or repairs, Ace’s Appliance Repair is here to help with all your appliance repair needs in Keller, TX, and the greater Tarrant County area.
For over 20 years, Ace’s Appliance Repair has been the trusted choice for repairing refrigerators, stoves, dishwashers, and more. Our fully licensed and insured team ensures peace of mind while delivering top-notch repairs, replacement, and maintenance. With decades of experience and continuous training, we work quickly to diagnose and fix appliances, regardless of their make or model. As a locally owned business, we understand the community’s need, offering prompt service and quick turnaround times to keep your household running smoothly.
-
Ways to Recycle Appliances Responsibly

With advances in technology, it’s tempting to replace old household appliances with newer and more energy-efficient models. But what should you do with the old ones? Simply throwing them away contributes to landfill waste and environmental degradation. Thankfully, there are several responsible ways to recycle appliances, whether it’s a large refrigerator or a small kitchen gadget. In this article, we’ll walk you through the best methods to ensure your old appliances find a second life or are disposed of in an eco-friendly manner.
Ways to Recycle Used Appliances
Donating your old appliance to a charitable organization is a win-win situation. Not only are you helping someone in need, but you’re also contributing to a sustainable environment. Before donating, make sure the appliance is in good working condition. If not, consider a quick appliance repair to bring it back to life. Organizations like Habitat for Humanity often accept gently used appliances and either resell them at discounted prices or use them in their housing projects.
Sell Them Used
If your old appliance is still in good working condition but you’re just looking to upgrade, selling it as a used item is an excellent option. Websites like Craigslist, eBay, or Facebook Marketplace are great platforms to find potential buyers. This way, you’re contributing to the circular economy, reducing waste, and making some extra cash in the process.
Contact a Recycling Company
For appliances that are too old or damaged to be used, contacting a professional recycling company is one of the best appliance recycling solutions. They specialize in appliance recycling and can ensure that various components are either reused or disposed of correctly. Look for a company that’s certified to handle appliances containing refrigerants like refrigerators or air conditioners, as improper disposal can harm the environment.
Consider Local Drop-Off Programs
Many municipalities offer appliance recycling programs where you can drop off your old appliances at designated locations. These programs often collaborate with local appliance repair companies to refurbish appliances that can be salvaged. For those that can’t be repaired, these programs ensure responsible disposal, including proper small appliance recycling. Keep an eye out for annual events or regularly scheduled drop-offs in your community.
Scrap the Parts
If you have a knack for DIY projects, scrapping your old appliances for parts is another responsible recycling method. You can remove components like motors, wires, and metals and take them to a local scrapyard. It’s essential to exercise caution when disassembling appliances, especially when dealing with electrical components. Always remember to disconnect any power sources before starting the project.
An Alternative Option: Get it Repaired
Perhaps the most sustainable way to recycle an appliance is not to recycle it at all. Before deciding to dispose of your appliance, consider reaching out to an appliance repair company. Many malfunctions are easily repairable, and a quick fix could extend the life of your appliance for several years. This approach reduces waste and conserves the energy and resources needed to produce a new appliance.
Conclusion
Recycling appliances responsibly is an important practice for both environmental sustainability and ethical reasons. From donating to charities, selling used items, or contacting professional appliance recycling services, there are multiple avenues to ensure your old appliance doesn’t end up in a landfill. Even small appliance recycling can make a big difference.
The key takeaway is to think before you throw an appliance away. With so many options available, there’s almost always a way to extend the life of your appliance or ensure its responsible disposal. Even a simple appliance repair can save an item from becoming waste, so always consider this as a first option. Whichever path you choose, you’ll be making a positive impact on the planet and contributing to a more sustainable future.
-
Dryer Repair, Is It Necessary?

Laundry is a never-ending household task, and for many, a dryer is indispensable in managing this chore efficiently. A well-functioning washer and dryer set can transform a dreaded task into a quick and easy process, leaving you with more time to spend on things that truly matter. But what happens when your dryer starts acting up? When you pull out clothes that are still damp after a 60 minute drying cycle or if you hear unsettling noises coming from the machine, anxiety may begin to set in. Is dryer repair essential, or can you get by with a quick DIY solution? In this article, we’ll discuss the reasons why professional appliance repair is often necessary and beneficial.
Common Problems with Dryers Not Working
- More Than Just No Power
While it might be obvious that a dryer not turning on is problematic, sometimes the issue is not that straightforward. It may be plugged in, and the circuit breakers are fine, but it still won’t start. This could be a problem with the start switch, door switch, or even the thermal fuse.
- Damp Clothes Aren’t Always Due to Overloading
If you notice that your clothes are still damp after a drying cycle, you may assume that you simply put too many clothes in the dryer at once. While this could be the cause, it’s also possible that the heating element is failing.
- Strange Noises Could Signal Multiple Issues
If you hear a squeaking or thumping noise, it may indicate a problem with the drum rollers or idler pulley. Each has its own set of issues and repair needs.
- Overheating is a Fire Hazard
An overheated dryer can be extremely dangerous and can lead to a fire. This issue could be due to blocked ventilation, a malfunctioning thermostat, or even a problematic heating element.
Why is it Necessary to Get a Dryer Repaired?
- Boost Energy Efficiency to Save Money
A poorly running dryer not only increases your electric bill but also puts added strain on the environment. A professional dryer repair can make your dryer more energy-efficient, which will ultimately save you money.
- Reliability for a Stress-Free Home
There’s enough to worry about in day-to-day life. A broken dryer should be one of them. Regular appliance repair can ensure that your dryer remains reliable, allowing for a smoother flow in your household.
- The Long-Term Savings of Preventive Care
Ignoring minor problems or skipping dryer maintenance can lead to more significant issues, increasing your long-term costs. Commercial dryer repair, in particular, can be quite expensive. Regular maintenance can help you avoid bigger, more expensive problems.
Advanced Signs That Your Dryer Needs Repairing
- Consistently Long Drying Times and increased Humidity
Long drying times are a hassle, but if you also notice increased humidity in the laundry area, this is a clear sign that your dryer is malfunctioning and possibly leaking moisture.
- Frequent and Unexplained Error Messages
Advanced dryers have diagnostic systems that provide error messages. While these messages can sometime be cleared with a quick restart, consistent or unexplained error messages often indicate a need for professional repair.
- Electrical Issues or Tripped Circuit Breakers
If your dryer is tripping the circuit breaker or if you experience other electrical issues like sparking or shocks, this is a severe issue that needs immediate attention.
Conclusion – The Undeniable Importance of Dryer Repair
Whether for commercial or residential use, the convenience of a well-functioning dryer can’t be overstated. Ignoring minor issues or neglecting basic dryer maintenance can lead to significant inconveniences, higher energy bills, and even safety risks.
So, is dryer maintenance and repair necessary? The answer is a resounding yes. It’s not just about resolving the inconvenience of wet clothes or damp linens; it’s about safety, efficiency, and the long-term well-being of your home or commercial setting. When you experience any signs of malfunction, it’s crucial to consult a professional appliance repair service promptly. Keep your home running smoothly and safely by giving your dryer the TLC and professional care it needs.
-
Refrigerator Maintenance Tips

A refrigerator is one of the most essential and frequently used appliances in our home. It’s a workhorse, running 24/7 to keep our food fresh and our beverages cool. However, it’s easy to overlook the fact that, like any machine, your fridge needs regular maintenance to operate efficiently. Without proper care, even the most robust refrigerator models can run into problems like inadequate cooling, unpleasant odors, or high energy consumption. In severe cases, lack of maintenance can even lead to expensive repairs or replacements. In this article, we’ll discuss the critical aspects of refrigerator maintenance, offering practical tips and guidelines to keep your appliance in peak condition.
How to Maintain Your Refrigerator
- Don’t forget to Close the Refrigerator Door Quickly
Leaving the refrigerator door open for too long can affect its cooling efficiency. Then the fridge has to work harder to cool things down again. Make it a habit to close the door as quickly as possible each time it’s opened to maintain the temperature and conserve energy.
- Check the Refrigerator’s Door Seal
In addition to closing the refrigerator door as soon as possible, you should check the rubber gasket that seals the door shut. A loose or damaged door seal allows cool air to escape, forcing your refrigerator to work harder. Check the door seal regularly for any wear and tear and replace it if necessary.
- Always Set the Correct Temperature for Efficient Cooling
Improper temperature settings can be detrimental to both the efficiency of the fridge and the longevity of the food stored inside. Your refrigerator should be set between 35-38° F, and your freezer should be set to 0° F. Check your appliance’s manual for specific recommendations.
- Arrange and Cover Items in the Refrigerator Properly
Avoid placing hot or moist items in the fridge as they can affect the internal temperature, so always allow your food to get to room temperature before placing it in the fridge. Also, when you place items in the refrigerator, make sure to use airtight containers to store food safely and prevent odors.
- Don’t Block the Vents Inside the Refrigerator
Proper air circulation is critical for maintaining a consistent temperature throughout your refrigerator. Air vents inside the fridge help distribute cool air. Arrange items efficiently, making sure the vents aren’t blocked by large objects or containers to ensure efficient cooling.
- Empty the Ice Accumulation, Defrost the Freezer
Ice build-up in the freezer can decrease its efficiency. Over time, ice sitting in your ice bin can form a solid mass that could cause odors. Make it a routine to empty the ice bins and defrost your freezer, especially if you notice thick ice accumulation.
- Avoid Placing the Refrigerator Too Close to the Walls
Your refrigerator needs room to breathe. Placing it too close to the walls can obstruct air circulation around the condenser coils. For adequate ventilation, maintain at least a two-inch gap between the refrigerator and the surrounding walls.
- Clean the Refrigerator’s Condenser Coils
The condenser coils in the back of your refrigerator are responsible for removing heat. Dirty or dusty condenser coils make the fridge work harder, consuming more energy. Do maintenance of the refrigerator coils every six months for optimal performance.
How Often Should a Refrigerator Be Maintained
For optimal performance, conduct a monthly general cleaning of your refrigerator, including checking the door seals. Tasks like defrosting the freezer and cleaning the condenser coils can be scheduled every six months. In addition to what you can do yourself, it’s advisable to have a yearly checkup performed by a professional appliance repair service to diagnose and repair any hidden issues.
Conclusion
Proper maintenance is crucial for extending the life and efficiency of your refrigerator. With consistent care, you can avoid costly repairs, reduce your energy bills, and ensure that your fridge will be there to serve you well for many years.